
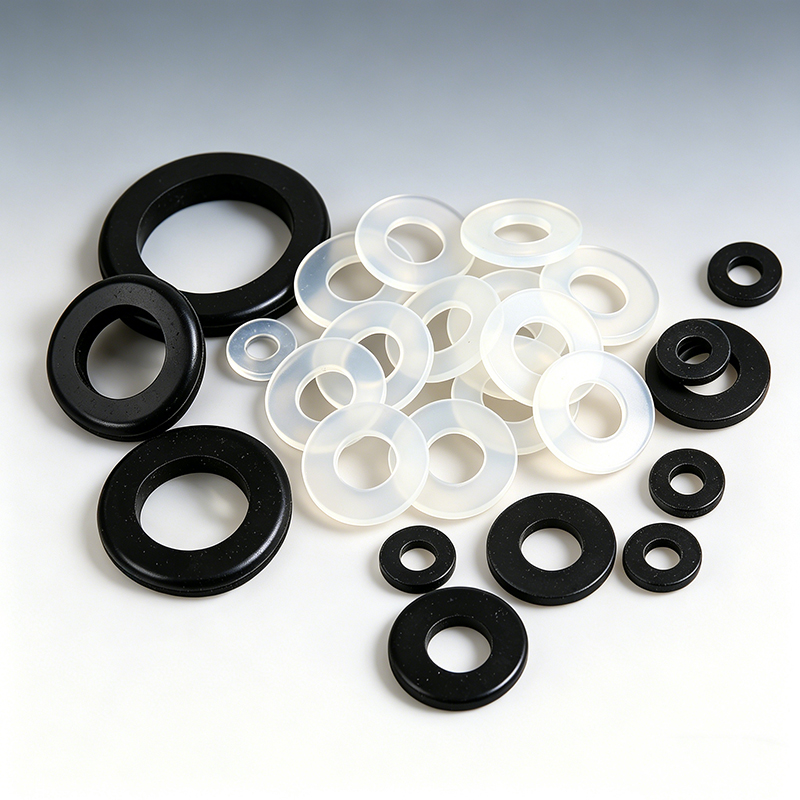
Are your rubber grommets1 cutting your cables instead of protecting them? You're not alone. Most failures happen after production, not during testing.
Custom rubber grommets1 fail because they're designed as seals, not stress buffers. The real issue is stress concentration2 at hole edges that creates cutting forces over time, leading to cable damage3 and system failure within 6-12 months of operation.

I've seen this pattern repeat hundreds of times. Your prototypes work perfectly. Your initial production runs pass all tests. Then six months later, you get calls about cable damage3, water ingress, or electrical failures. The problem isn't your testing. It's understanding what grommets actually do.
What's the Real Function of a Rubber Grommet?
Most people think grommets are just rubber rings that seal holes. That's wrong. This misunderstanding kills more projects than bad materials ever will.
A grommet is fundamentally a stress buffer, not a simple seal. It must absorb and distribute mechanical forces from cable movement, vibration, and thermal cycling while maintaining protection and sealing over thousands of stress cycles.

I learned this the hard way on an automotive project. We designed grommets that passed every static test. Perfect fit, great seal, excellent material properties. Three months after production started, we had warranty claims. The grommets were cutting through cable jackets.
The cables vibrated during vehicle operation. Even tiny movements created stress concentration2 at the hole edges. Over time, these stress points hardened and became cutting edges. The grommet transformed from protector to destroyer.
This taught me that grommet design4 isn't about sealing. It's about stress path engineering5. You need to think about where forces go, how they accumulate, and what happens under thousands of micro-movements6. The hole edge is always the critical point. If you don't manage stress there, everything else fails.
Why Do Grommets Cut Cables Instead of Protecting Them?
The most dangerous assumption is that soft materials automatically protect cables. Soft materials without proper structure create worse problems than hard ones.
Cable cutting occurs when stress concentration2 at grommet hole edges7 creates localized hardening under repeated micro-movements6. The hardened material develops sharp edges that gradually cut through cable insulation, leading to electrical failure or water ingress.

Here's what actually happens in your application. Your cable moves slightly during operation. This could be thermal expansion, vibration, or just normal flexing. Each movement compresses and stretches the grommet material around the hole.
The hole edge experiences the highest stress because it's the transition point between supported and unsupported material. Over hundreds or thousands of cycles, this area fatigues first. Fatigued rubber becomes harder. Hard rubber with sharp edges cuts cables.
| Failure Stage | Timeline | Visible Signs | Root Cause |
|---|---|---|---|
| Initial | 0-3 months | Perfect function | Normal operation |
| Stress concentration | 3-6 months | Slight material hardening | Repeated micro-movements6 |
| Edge hardening | 6-9 months | Visible wear marks | Fatigue-induced hardening |
| Cable damage | 9-12 months | Cut insulation, exposed wire | Sharp hardened edges |
| System failure | 12+ months | Water ingress, shorts | Complete protection loss |
The worst part is this process is invisible during normal testing. Static pull tests don't reveal it. Even dynamic testing misses it unless you specifically test for long-term micro-movement fatigue. Most engineers only discover the problem after production when field failures start appearing.
How Do You Design Grommets That Actually Protect Cables?
Structure beats material every time. The best rubber in the world can't save a bad design. The worst rubber with good stress distribution8 often outperforms premium materials.
Effective grommet design4 requires eliminating stress concentration2 through geometric features: radiused hole edges to prevent cutting, stepped profiles to distribute forces, and relief channels to accommodate movement without material fatigue.

I always start with the hole edge geometry. Sharp edges create stress concentration2. You need a radius of at least 0.5mm on all hole edges. Bigger is usually better unless space constraints prevent it. This single change eliminates most cutting failures.
Next comes the stress distribution8 structure. I add what I call buffer lips9 around the hole. These are small raised sections that contact the cable first. They deform under stress, absorbing energy before it reaches the main hole structure. Think of them as sacrificial stress absorbers.
The third element is axial movement control. Cables don't just flex sideways. They also push and pull along their length. Without proper anchoring, this movement concentrates stress at the hole edge. I use stepped internal profiles to grip the cable without creating stress points.
| Design Feature | Function | Typical Dimensions | Stress Reduction |
|---|---|---|---|
| Hole edge radius | Eliminate stress concentration2 | 0.5-2.0mm | 60-80% |
| Buffer lips | Primary stress absorption | 0.3-1.0mm height | 40-60% |
| Stepped profile | Axial movement control | 2-5mm steps | 30-50% |
| Relief channels | Accommodate thermal growth | 0.5-1.5mm width | 20-40% |
Material selection comes after structure design. You're not picking the best material. You're picking the material that won't fail under your specific stress patterns. For dynamic applications10, I typically use 60-70 Shore A hardness. This provides enough structure to maintain shape while allowing stress absorption.
What Materials Actually Work for Long-Term Grommet Applications?
Material selection is environmental filtering, not performance optimization. Your environment eliminates most materials before you consider performance characteristics.
Material durability depends on resistance to stress-induced hardening11 rather than initial properties. EPDM12 and silicone13 resist hardening under UV and ozone exposure, while NBR14 handles oil contact, but material choice must prioritize long-term flexibility retention over initial hardness values.

Most engineers focus on initial material properties. Shore A hardness, tensile strength, elongation values. These matter, but they don't predict field performance. What matters is how the material changes over time under stress.
I've seen perfect initial test results turn into field failures because the material hardened under service conditions. UV exposure, ozone, temperature cycling, and chemical contact all change rubber properties. The material that tests best initially often performs worst long-term.
For outdoor applications, EPDM12 and silicone13 resist UV-induced hardening. For oil contact, NBR14 maintains flexibility longer than other materials. For high-temperature applications, silicone13 and FKM resist thermal degradation. But within each category, you need materials that specifically resist stress-induced hardening11.
| Environment | Recommended Material | Key Advantage | Hardening Resistance |
|---|---|---|---|
| Outdoor/UV | EPDM12, Silicone | UV stability | Excellent |
| Oil contact | NBR14, CR | Chemical resistance | Good |
| High temperature | Silicone, FKM | Thermal stability | Excellent |
| General purpose | EPDM12, NR | Cost/performance balance | Good |
| Food contact | FDA Silicone | Regulatory compliance | Excellent |
The Shore A hardness sweet spot for dynamic grommets is 60-70A. Softer materials collapse under stress, creating worse stress concentration2. Harder materials don't absorb stress effectively. This range provides structural stability while maintaining stress absorption capability.
I always request stress-strain hysteresis data from material suppliers. This shows how much energy the material absorbs during deformation cycles. High energy absorption means better stress buffering and longer life.
How Does Manufacturing Quality Affect Grommet Performance?
Manufacturing defects create stress concentration2 points that guarantee premature failure. Perfect design with poor manufacturing produces worse results than mediocre design with excellent manufacturing.
Manufacturing quality determines stress distribution8 through parting line placement15, flash control16, and cure uniformity17. Parting lines in high-stress areas create failure initiation points, while flash creates cutting edges that damage cables over time.

The mold parting line location is critical. This is where the two mold halves meet during molding. There's always a slight material discontinuity at this line. If it falls in a high-stress area like the hole edge, it becomes a failure initiation point.
I specify parting line placement15 away from all stress concentration2 areas. Usually on the outer diameter where stress is lowest. This requires more complex tooling but prevents field failures. The tooling cost difference is minimal compared to warranty costs.
Flash control is equally important. Flash is excess material that forms at mold parting lines. Even small amounts of flash create sharp edges that cut cables. I require flash removal to 0.1mm maximum, with all edges chamfered.
Cure uniformity affects material properties throughout the part. Undercured areas remain soft and fail under stress. Overcured areas become brittle and crack. Temperature and time control during vulcanization must be precise to achieve uniform properties.
| Manufacturing Factor | Impact on Performance | Quality Control Method | Failure Mode if Poor |
|---|---|---|---|
| Parting line placement | Stress concentration | Design review, first article | Crack initiation |
| Flash control | Sharp edges | Dimensional inspection | Cable cutting |
| Cure uniformity | Material properties | Hardness mapping | Premature aging |
| Demolding technique | Internal stress | Process monitoring | Stress cracking |
I visit every potential supplier's facility before approving them. Manufacturing capability varies dramatically between suppliers, even for identical specifications. The difference in field performance can be 2-5x between good and poor manufacturing.
Conclusion
Custom rubber grommets1 fail when designed as seals instead of stress management systems, requiring proper geometry and manufacturing to prevent cable damage3.
Explore this link to find high-quality rubber grommets that effectively protect cables from damage. ↩
Understanding stress concentration is crucial for designing effective grommets; this resource explains its impact. ↩
Learn about the common causes of cable damage in grommet applications to avoid future failures. ↩
Discover best practices in grommet design to enhance performance and longevity. ↩
This resource delves into stress path engineering, a key concept for effective grommet design. ↩
Explore how micro-movements can lead to grommet failure and how to mitigate this issue. ↩
Understanding the role of hole edges in grommet design can prevent cable damage. ↩
Explore techniques for managing stress distribution to improve grommet performance. ↩
Learn how buffer lips can enhance stress absorption in grommet applications. ↩
Explore the unique challenges posed by dynamic applications and how to address them. ↩
Learn about stress-induced hardening and its implications for grommet longevity. ↩
Learn about the advantages of EPDM in grommet applications, especially for outdoor use. ↩
Explore the benefits of silicone in grommet design, particularly in high-temperature environments. ↩
Discover the properties of NBR and its suitability for grommet applications involving oil. ↩
Discover how proper parting line placement can prevent premature grommet failure. ↩
Understanding flash control is essential for preventing sharp edges that can damage cables. ↩
Learn about the importance of cure uniformity for ensuring grommet durability. ↩