
Choosing the wrong anti-vibration mount can destroy your equipment and waste thousands of dollars. Many engineers overlook critical factors that lead to poor performance and unexpected repair costs.
Anti-vibration mounts reduce vibration and noise by isolating equipment from its mounting surface. The right mount matches your equipment's vibration frequency1, load requirements, and environmental conditions to provide optimal isolation and protect your investment.

I've seen too many projects fail because someone picked the wrong mount. One client installed standard rubber mounts2 on high-frequency equipment, only to find the vibrations got worse. They had to replace everything and lost weeks of production time.
What are anti-vibration mounts3 and why do they matter?
Anti-vibration mounts seem simple, but choosing wrong can cost you big. These small components protect expensive equipment and keep your operations running smoothly.
Anti-vibration mounts are isolation devices that reduce vibration transmission4 between equipment and its mounting surface. They absorb dynamic forces, minimize noise, and protect both the equipment and surrounding structures from vibration damage.

Anti-vibration mounts work by creating a barrier between vibrating equipment and its foundation. When equipment operates, it generates vibrations that can damage sensitive components, create noise problems, and reduce equipment life. The mount absorbs these vibrations before they transfer to the building structure.
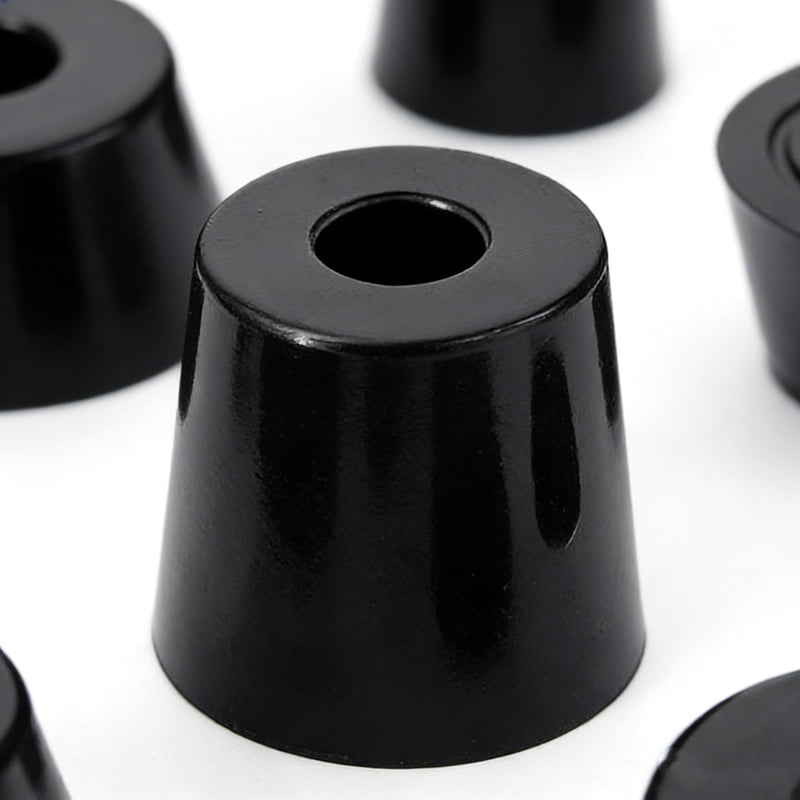
Different mount types serve different purposes. Rubber mounts handle general vibration isolation for light to medium loads. Spring mounts work better for heavy equipment with low-frequency vibrations. Combination mounts use both rubber and springs for complex vibration patterns.
| Mount Type | Best For | Load Range | Frequency Range |
|---|---|---|---|
| Rubber Mounts | General purpose, light equipment | 5-500 lbs | High frequency (>20 Hz) |
| Spring Mounts | Heavy machinery, HVAC | 100-10,000 lbs | Low frequency (<20 Hz) |
| Combination | Complex vibration patterns | 50-5,000 lbs | Full spectrum |
| Pneumatic | Precision equipment | 10-1,000 lbs | Ultra-low frequency |
The material choice5 affects performance significantly. Natural rubber provides excellent vibration damping but degrades in harsh environments. EPDM rubber6 resists weather and chemicals better. Silicone handles extreme temperatures. Neoprene offers good all-around performance with oil resistance.
How do you choose the right vibration frequency1 rating?
Getting the frequency wrong is the biggest mistake I see. Your mount must match your equipment's vibration characteristics or it won't work properly.
Match the mount's natural frequency to be 3-5 times lower than your equipment's operating frequency for effective isolation. Higher frequency ratios provide better vibration reduction but may cause stability issues.

Equipment vibration frequency1 depends on its operating speed and design. Motors running at 1800 RPM generate vibrations at 30 Hz. Pumps, compressors, and fans each have different frequency signatures. You need to know your equipment's dominant frequencies before selecting mounts.
I worked with a factory that installed rubber mounts2 rated for high frequencies on low-speed heavy machinery. The mounts couldn't handle the low-frequency forces and failed within months. We replaced them with spring mounts7 designed for low frequencies, and the problem disappeared.
Frequency analysis requires measuring actual vibrations during operation. Simple accelerometers can identify dominant frequencies. Many equipment manufacturers provide vibration data in their specifications. If you don't have this data, consult with your mount supplier for guidance.
The isolation efficiency improves dramatically when the frequency ratio exceeds 3:1. At 2:1 ratio, you get about 60% isolation. At 4:1 ratio, isolation jumps to 94%. Higher ratios provide better performance but make the system less stable and more sensitive to installation errors8.
Environmental factors affect frequency requirements. Temperature changes alter rubber stiffness, shifting the natural frequency. Aging hardens rubber compounds over time. Chemical exposure can soften or harden materials. Plan for these changes when selecting frequency ratings.
What load capacity9 should your mounts handle?
Undersized mounts fail quickly and create safety hazards. Oversized mounts waste money and may not provide proper isolation. Getting the load calculation right is critical.
Calculate total equipment weight including all attachments, then add 20-30% safety margin. Distribute this load evenly across all mount points, considering dynamic forces during operation and any uneven weight distribution.

Static load calculation seems straightforward, but many people forget about dynamic loads10. Operating equipment creates additional forces from rotating masses, reciprocating parts, and thermal expansion. A pump weighing 500 pounds might generate 1000 pounds of dynamic force during startup.
I remember a project where the client calculated loads based only on equipment weight. They didn't account for the heavy piping connected to their pumps. The mounts compressed too much, causing misalignment and premature wear. We had to upgrade to higher capacity mounts and redesign the mounting system.
Weight distribution matters as much as total weight. Equipment with uneven weight distribution needs different mount capacities at each location. The heaviest mount point should handle the maximum load without compression, while lighter points maintain proper contact.
| Equipment Type | Dynamic Load Factor | Safety Margin |
|---|---|---|
| Electric Motors | 1.2-1.5x static | 25% |
| Pumps/Compressors | 1.5-2.0x static | 30% |
| Generators | 1.3-1.8x static | 25% |
| HVAC Equipment | 1.1-1.4x static | 20% |
Mount deflection affects system performance. Too much deflection reduces isolation efficiency and may cause operational problems. Most rubber mounts2 work best with 10-25% compression. Spring mounts typically deflect 1-2 inches under full load. Check manufacturer specifications for optimal deflection ranges.
Consider load changes over time. Equipment modifications, additional attachments, or process changes can increase loads beyond original calculations. Choose mounts with some reserve capacity to handle future modifications without replacement.
Which materials work best for your environment?
Environmental conditions destroy the wrong materials quickly. Chemical exposure, temperature extremes, and UV radiation11 can turn quality mounts into expensive failures within months.
Select mount materials based on your specific environmental conditions. Natural rubber provides excellent vibration damping in normal conditions, while specialized compounds like EPDM, silicone12, or neoprene13 handle harsh environments better.

Natural rubber offers the best vibration damping properties and costs less than synthetic alternatives. It works well indoors with moderate temperatures and no chemical exposure. However, it degrades quickly in sunlight, ozone, and many industrial chemicals.
EPDM rubber6 resists weather, ozone, and many chemicals while maintaining good vibration properties. It handles temperature ranges from -40°F to 300°F. I recommend EPDM for outdoor installations and chemical processing environments. The cost increase over natural rubber is usually worth the extended life.
Silicone excels in extreme temperatures from -65°F to 400°F but costs significantly more. It resists most chemicals and maintains flexibility in cold conditions. Use silicone12 when temperature extremes would destroy other materials, but expect to pay 3-4 times more than standard rubber.
Neoprene provides good all-around performance with oil resistance and moderate chemical resistance. It costs more than natural rubber but less than EPDM or silicone12. Neoprene works well in automotive and marine applications where oil exposure is common.
| Material | Temperature Range | Chemical Resistance | Cost Factor | Best Applications |
|---|---|---|---|---|
| Natural Rubber | -20°F to 180°F | Poor | 1.0x | Indoor, general purpose |
| EPDM | -40°F to 300°F | Good | 1.5x | Outdoor, chemical plants |
| Silicone | -65°F to 400°F | Excellent | 3.5x | Extreme temperatures |
| Neoprene | -30°F to 250°F | Moderate | 2.0x | Oil exposure, marine |
UV radiation11 degrades most rubber compounds over time. Outdoor installations need UV-resistant materials or protective covers. Carbon black helps protect against UV damage but limits color options to black.
Chemical compatibility requires careful evaluation. Even "chemical resistant" materials can fail with specific chemicals. Test samples in your actual environment when possible, or consult chemical compatibility14 charts from material suppliers.
How do you ensure proper installation and maintenance15?
Perfect mounts installed wrong perform poorly. Installation errors cause premature failure, reduced isolation, and safety problems. Proper installation and maintenance15 keep your mounts working for years.
Install mounts on level, rigid surfaces with proper alignment and torque specifications. Regular inspection for wear, cracking, or compression loss prevents failures and maintains optimal vibration isolation throughout the mount's service life.

Foundation preparation affects mount performance significantly. Uneven surfaces create stress concentrations that cause premature failure. Soft foundations reduce isolation efficiency and may cause instability. The mounting surface should be level within 1/8 inch and rigid enough to support the full load without deflection.
Alignment during installation prevents binding and uneven loading. Equipment should sit naturally on the mounts without forcing connections. Misalignment creates side loads that reduce mount life and isolation performance. Use shims or adjustable mounts to achieve proper alignment.
Torque specifications prevent over-tightening that compresses mounts beyond their design limits. Under-tightening allows movement that causes wear and noise. Follow manufacturer torque recommendations, typically 25-50% of normal bolt torque for rubber mounts2. Spring mounts usually require full torque since the spring handles compression.
I've seen installations where someone cranked down the bolts thinking tighter was better. The mounts compressed so much they couldn't isolate vibrations properly. The equipment vibrated worse than without mounts. Always follow the manufacturer's installation instructions exactly.
Regular inspection catches problems before they cause failures. Look for cracking, hardening, or unusual compression in rubber mounts2. Spring mounts should maintain their height and show no signs of corrosion or binding. Replace mounts showing significant wear before they fail completely.
Maintenance schedules depend on operating conditions and mount materials. Indoor installations with mild conditions might need annual inspection. Harsh environments may require quarterly checks. Keep records of installation dates and inspection results to track mount life and plan replacements.
Conclusion
Choosing the right anti-vibration mount requires matching frequency, load, material, and environmental requirements to avoid costly mistakes and equipment damage.
Learn the importance of matching vibration frequency for optimal equipment performance. ↩
Discover why rubber mounts are popular for general vibration isolation applications. ↩
Explore how anti-vibration mounts can protect your equipment and enhance performance. ↩
Discover methods to reduce vibration transmission for better equipment protection. ↩
Understand the impact of different materials on mount durability and effectiveness. ↩
Discover why EPDM rubber is ideal for harsh environmental conditions. ↩
Find out the best applications for spring mounts and their benefits. ↩
Learn how to ensure proper installation to maximize mount performance. ↩
Understand how to calculate load capacity to ensure safety and efficiency. ↩
Understand the importance of considering dynamic loads in your calculations. ↩
Understand the impact of UV exposure on mount longevity and performance. ↩
Learn how silicone can withstand extreme temperatures and harsh conditions. ↩
Find out how neoprene offers good performance in oil exposure applications. ↩
Explore how to choose materials based on chemical exposure risks. ↩
Explore maintenance tips to extend the life of your anti-vibration mounts. ↩